How I Got an RCMP Police Certificate for an Australian Visa
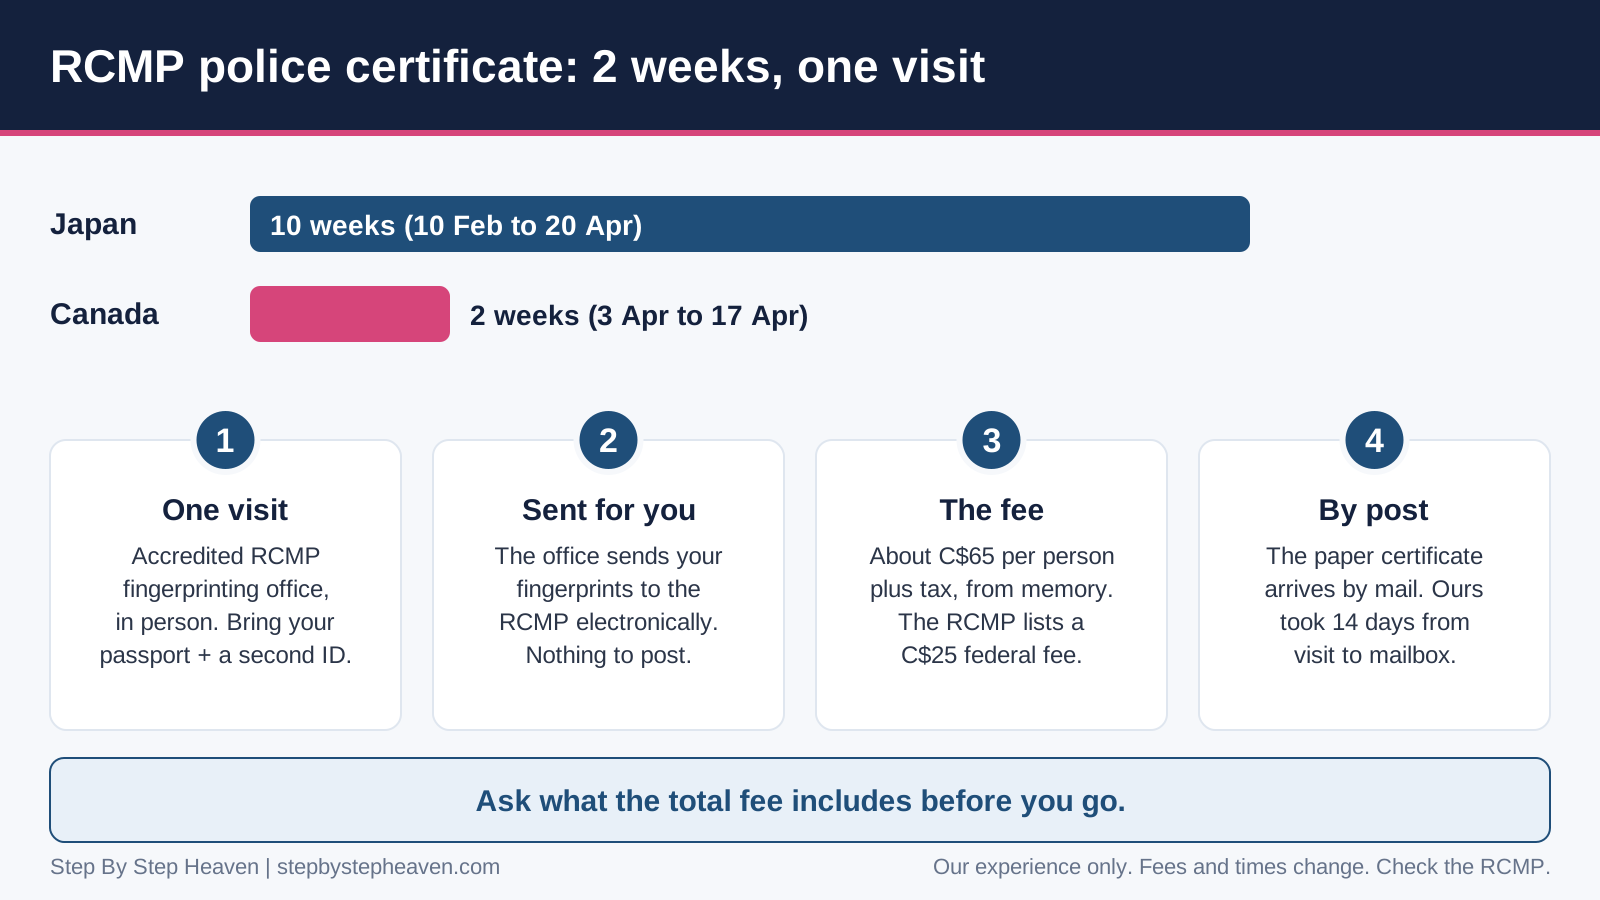
After ten weeks of waiting for my Japanese police certificate, the Canadian one felt almost unfair. I applied on 3 April and the certificate was in my hands on 17 April, two weeks later. I did not have to call anyone, and I did not have to keep checking.
If you have lived in Canada and you need a police certificate for an Australian visa, this is what the process looked like for me: where I went, what I brought, what it cost, and how long it really took. If you have also lived somewhere slower, it is a useful comparison. I wrote about the slow one in my Japanese police certificate post.
I am not a migration agent or a lawyer, and fees and processes change. Treat this as one person’s experience, and check the RCMP and Home Affairs pages before you go.
What the RCMP Says (Checked 25 September 2026)
The RCMP publishes a page called Processing times and fees, last modified on 21 May 2025 when I looked. The points that matter for an applicant like me were:
- Fingerprints are taken by an accredited fingerprinting company or a local police agency, and can be sent to the RCMP electronically.
- The federal fee is 25 Canadian dollars per check. On top of that, the fingerprinting provider sets its own fee, so the total you pay depends on where you go.
- If the RCMP finds no match, processing can take three business days or less. If a match is found, or if the check needs manual processing, it can take up to 120 business days.
- The results are sent by postal mail to the address you give, so allow extra time for delivery.
How It Went for Me, Step by Step
1. I found an accredited fingerprinting office. The office I used only does RCMP-related fingerprinting. I went there in person to have my fingerprints taken.
2. I told them what the certificate was for. I said it was for an Australian visa application. Their staff told me clearly what to bring: two pieces of valid ID, my passport and my driver’s licence. Have both with you, because one is not enough.
3. They took my fingerprints and sent them on for me. The office submitted my fingerprints to the RCMP electronically. I did not have to post anything myself. The staff were friendly and helpful, which made the whole visit easier than I expected.
4. I paid. For each person, I paid 65 dollars plus tax for the fingerprinting and 25 dollars for the RCMP’s own fee, so 90 dollars plus tax per person. Fingerprinting prices differ from one provider to another, so ask what is included before you go, and check the RCMP’s own page for its current fee.
5. I was told to expect two to three weeks. The result would be mailed to me, not emailed.
6. It arrived by post. On 17 April, exactly two weeks after my visit on 3 April, my certificate arrived in the mail as a paper document. That was inside the two to three weeks the office had told me to expect.
Timeline at a Glance
| Date | What happened |
|---|---|
| 3 April | Visited an accredited fingerprinting office, gave my ID and had my fingerprints taken |
| 17 April | The paper certificate arrived by post |
Two weeks, from the day I walked in to the day I held it.
A Second RCMP Check, for a Korean Visa
The Australian certificate was not my only one. Because we plan to be in South Korea around April 2027, I had a new RCMP check done recently for a visa there. I have hidden the dates and every personal detail in the photo below.
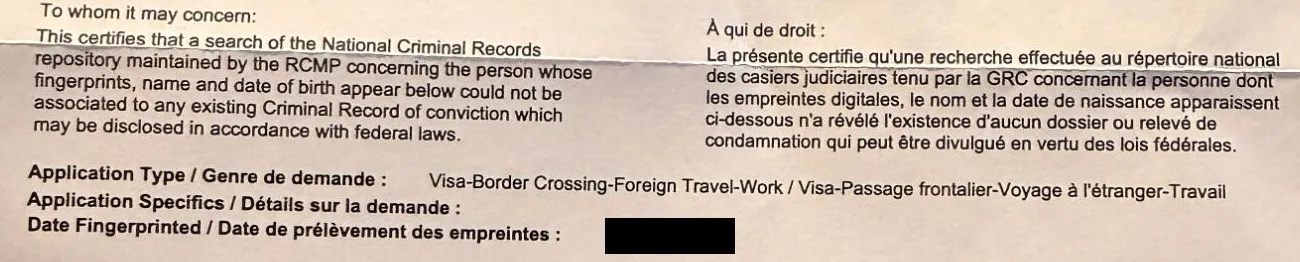
The wording on my newer certificate. Only the statement and the application type are shown.
The certificate has an “application type” field, so it is worth telling the fingerprinting office which visa the certificate is for.
Compared With My Japanese Certificate
The difference between the two was huge. For Japan, I visited a consulate, went to a separate place to have my fingerprints taken, and then waited about ten weeks for the certificate to come from Japan. For Canada, I went to one office, did everything in one visit and had the paper certificate in two weeks. If you want to see how these fit into the whole application, my month-by-month timeline has both dates in context.
What I Would Do Differently
Honestly, not much. For the Canadian certificate, the process was short and clear. If I did it again I would do the same things:
- Take two pieces of valid ID, including your passport.
- Tell the office it is for an Australian visa, so they use the right process.
- Ask what the total fee includes, and whether you pay them or the RCMP separately.
- Check that the mailing address you give them is one where you will actually be for the next few weeks.
- Ask your agent when they want the certificate, and check how long it will be accepted, so that you do not get it too early or too late.
RCMP Certificate Steps in Order
- Find out which countries you need certificates for.
- Book or find an accredited RCMP fingerprinting office near you.
- Bring your passport and a second piece of valid ID.
- Tell them it is for an Australian visa.
- Ask what the total fee includes.
- Confirm your mailing address.
- Expect the result by post in about two to three weeks if you have no record.
- Keep the paper certificate safe and upload it to your application.
Where to Go Next
If you have lived in another country too, start the slowest certificate first. Read my document checklist for the full list of what I had to collect, and the mistakes we nearly made for the things I nearly got wrong.
I am a Japanese-born applicant living in Canada, applying with my husband for the Australian subclass 491 visa. I am not a registered migration agent, and this is my own experience, not legal advice.